

Another transmission goes down. Another day of lost productivity. Another emergency repair bill that could’ve been avoided.
If you’re dealing with repeated parts failures, the problem isn’t bad luck, it’s usually something you can fix. The trick is figuring out what’s actually causing the failure instead of just replacing the broken part and hoping it doesn’t happen again.
This guide walks you through systematic heavy equipment parts failure analysis techniques that help you identify root causes, read wear patterns like a detective, and put prevention strategies in place that actually work.
Understanding Failure Modes
Failure modes tell you how a part failed, which points you toward why it failed.
Every part fails in specific ways based on what stresses it’s under. A bearing that runs too hot fails differently from one that’s contaminated with dirt. A gear that’s overloaded shows different damage than one with alignment problems. Learning to recognize these patterns is the first step in part failure diagnosis.
Here are the most common failure modes you’ll see:
- Fatigue failure – Cracks develop from repeated stress cycles over time
- Overload failure – Sudden breakage from forces exceeding design limits
- Wear failure – Gradual material loss from friction and abrasion
- Corrosion failure – Chemical or environmental degradation of materials
- Thermal failure – Damage from excessive heat or temperature cycling
Each mode leaves specific clues. Fatigue cracks show progressive growth patterns. Overload breaks look sudden and clean. Wear creates smooth, polished surfaces or grooves. Corrosion leaves pitting and discoloration. Thermal damage shows bluing, warping, or metallurgical changes.
Root Cause Analysis Techniques
Finding the real cause means looking past the obviously broken part.
When a final drive fails, the gears might be damaged but that’s not the root cause. Maybe the oil was low. Why was the oil low? The seal failed. Why did the seal fail? Wrong lubricant specification. That’s your root cause.
The Five Whys Method
This simple technique digs past surface symptoms. Ask “why” five times to get to the actual problem.
Example: The Hydraulic pump failed.
- Why? Cavitation damage.
- Why? Air in the system.
- Why? Loose suction line fitting.
- Why? Vibration loosened it.
- Why? Missing mounting bracket on hydraulic tank.
Now you know fixing the pump without addressing the missing bracket means you’ll be doing this again soon.
Failure Analysis Checklist
Use this systematic approach for any component failure:
Physical Inspection
- Document all damage with photos before disassembly
- Note the location and orientation of broken parts
- Look for secondary damage to surrounding components
- Check for evidence of contamination or overheating
Operating History Review
- When did the failure occur (hours, cycles, load conditions)?
- Were there warning signs (noise, vibration, temperature)?
- What maintenance was performed recently?
- Has this component failed before?
Environmental Factors
- Operating temperature extremes
- Contamination exposure (dust, water, chemicals)
- Duty cycle and load variations
- Storage and transportation conditions
Reading Wear Patterns
Wear patterns are like fingerprints, they tell you exactly what happened.
Bearing Failures
Bearing wear patterns reveal operating conditions better than almost anything else. Proper bearing failure analysis can prevent repeated problems with rebuilt components.
- Spalling – Looks like small pits or flakes on the race surface. This comes from fatigue after normal service life or from contamination accelerating wear. Check lubricant cleanliness and service intervals.
- Brinelling – Shows as evenly spaced dents around the bearing race. Caused by impact loads or vibration while the bearing isn’t rotating. Look at mounting procedures and transportation practices.
- Smearing – Surfaces look like they’ve been rubbed or skidded. Happens when bearings slip instead of rolling, typically due to inadequate lubrication or excessive loads.
- Corrosion – Rust or oxidation on bearing surfaces. Water contamination in the oil or condensation from temperature cycling. Check seals and breather caps.
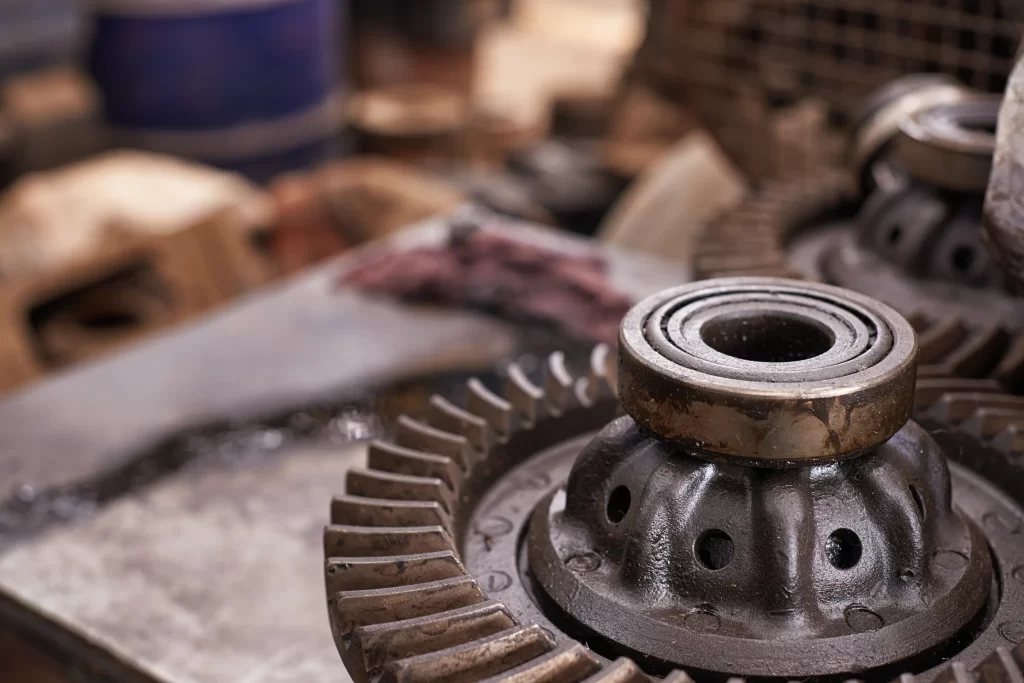
Gear Tooth Damage
Gear teeth exhibit specific patterns that reveal what’s wrong with the system.
- Pitting – Small craters on tooth surfaces, usually starting at the pitch line. Normal fatigue wear that accelerates with contaminated oil or overloading.
- Scoring – Long scratches parallel to the tooth. Metal-to-metal contact from lubrication failure. Check oil level, pump operation, and lubricant specifications.
- Spalling – Large chunks breaking off teeth. Advanced fatigue failure or sudden overload. Often follows pitting if not addressed.
- Edge contact – Wear concentrated on tooth edges instead of across the face. Misalignment between gears. Check housing distortion, bearing wear, or assembly procedures.
Hydraulic Component Wear
Hydraulic parts indicate contamination and fluid conditions.
Pumps and motors with fine scratches on pistons or cylinder bores show abrasive contamination. This means your filtration isn’t working, or you’re letting dirt past the seals. Rough, eroded surfaces indicate cavitation—air in the system or restricted inlet flow.
Valve spools with scoring indicate contamination or incorrect clearances from improper rebuild procedures. Excessive wear on one side of a spool indicates binding or misalignment in the valve body.
Common Failure Mechanisms by Component Type
Different components fail for different reasons, and knowing the common culprits saves diagnostic time.
Transmission and Drivetrain
Most transmission failures trace back to three things: heat, contamination, or improper operation. Overheating breaks down fluid, hardens seals, and causes clutch material to glaze. Contamination accelerates wear on bearings and gears. Operating outside design parameters—like shifting under load or using wrong gear ratios—creates forces the components can’t handle.
Watch transmission temperatures during operation. If you’re consistently running hot, you’ve got a cooling system problem, or you’re overworking the transmission for the application.
Final Drives and Differentials
These components experience significant torque loads, so failures are usually caused by overload, shock loads, or lubrication issues. Gear tooth breakage often indicates someone is trying to move too much weight or hitting obstacles that create impact loads.
Oil contamination is the other major killer. Water in gear oil destroys bearing surfaces fast. Check breathers and seals, and make sure operators aren’t pressure-washing components where water can get inside.
Hydraulic Systems
Contamination causes about 75% of hydraulic failures. Dirt particles smaller than you can see cause erosion, scoring, and accelerated wear. When you’re dealing with parts solutions for hydraulic components, clean oil isn’t optional—it’s everything.
The other major issue is heat. Hydraulic oil over 180°F starts breaking down. Once it degrades, it doesn’t lubricate properly, seals get brittle, and failures cascade through the system.
Preventive Maintenance Strategy Development
Good equipment failure prevention means fixing problems before they cause failures.
Oil Analysis Programs
Regular oil sampling catches problems early. Wearing metals in the oil tells you which components are wearing. Silicon indicates dirt contamination. Water shows up as cloudiness or emulsification. Fuel dilution changes viscosity.
Sample at consistent intervals—don’t wait until something seems wrong. Trending the data over time shows developing problems, so you can still plan repairs rather than deal with emergency breakdowns.
Vibration Monitoring
Vibration analysis detects bearing wear, misalignment, and balance problems before they cause catastrophic failure. Even basic vibration pens can identify problems if you establish baseline readings and check regularly.
Increasing vibration at specific frequency points to specific problems. Bearing frequencies indicate bearing damage. Gear mesh frequencies show gear problems. Imbalance shows up at the rotational speed.
Thermal Imaging
Infrared cameras spot overheating components during operation. Hot bearings, hydraulic lines, or electrical connections all show up clearly. Temperature differences between similar components often indicate developing problems.
Check equipment under normal operating loads. Cold starts don’t reveal problems that only surface when things are under stress.
Scheduled Inspections
Visual inspections catch issues before they appear in oil samples or vibration readings. Look for:
- Fluid leaks (even small ones indicate seal problems)
- Loose or missing fasteners
- Cracked or damaged hoses and lines
- Unusual wear on tires or tracks (indicates alignment issues)
- Abnormal noise or operation
Document everything. Photos and notes from inspections create a history that helps with failure analysis later.
Implementing Failure Prevention Programs
Prevention programs only work if you actually use them consistently.
Start with your highest-cost failures. Which components cause the most downtime? Where are you spending the most on emergency repairs? Focus prevention efforts there first—you’ll see results faster and get buy-in for expanding the program.
Track everything. Record all failures, repairs, and maintenance. This data shows patterns you’d miss otherwise. Maybe certain equipment fails more in the summer heat. Maybe one operator has more breakdowns than others. You can’t fix what you don’t measure.
Train operators to report early warning signs. Strange noises, performance changes, unusual vibration—operators notice these things first. Make it easy to report and follow up on concerns before they become failures.
Get Ahead of Equipment Failures
Systematic failure analysis beats guessing every time.
When you understand failure modes, follow diagnostic procedures, and read wear patterns correctly, you stop replacing parts and start fixing problems. That means less downtime, lower costs, and equipment that lasts longer.
The key is being methodical. Document failures, ask why until you find root causes, and use condition monitoring to catch problems early. It takes more effort upfront, but it’s cheaper than emergency repairs and lost productivity.
Need help diagnosing recurring equipment problems or sourcing quality replacement parts? Advantage Construction Equipment & Parts brings decades of heavy equipment experience to every component we rebuild and every part we supply. Contact us to discuss your specific maintenance challenges.
Frequently Asked Questions
What’s the difference between a failure mode and a root cause?
The failure mode describes how a part failed, such as a cracked gear tooth or a seized bearing. The root cause explains why it failed—like contaminated oil or excessive loads. Understanding this difference is critical for effective heavy equipment parts failure analysis because fixing the failure without addressing the root cause means you’ll see the same problem again.
How do I know if a failure was caused by a defective part or operational issues?
Examine the wear pattern and failure location carefully. Defective parts often fail early in their service life and exhibit manufacturing flaws, such as casting defects or machining errors. Operational failures develop over time and show patterns consistent with overload, contamination, or inadequate maintenance. Document operating hours, maintenance history, and conditions when the failure occurred.
What’s the most cost-effective failure prevention strategy?
Oil analysis programs typically offer the best return on investment. Testing costs are minimal compared to component replacement, and early detection of wear metals or contamination lets you address problems during scheduled maintenance instead of emergency breakdowns. Combined with operator training to report warning signs, oil analysis catches most developing problems before they cause failures.
How often should I perform failure analysis on broken parts?
Analyze every unexpected failure and any failure that causes significant downtime or cost. Routine wear-out failures after expected service life may not need detailed analysis, but patterns of repeated failures definitely do. Keep failed parts until analysis is complete—you can’t learn much from parts that got thrown away or cleaned up before inspection.
Can I prevent all equipment failures with proper maintenance?
No maintenance program prevents all failures—parts eventually wear out even with perfect care. However, effective equipment failure-prevention programs dramatically reduce unexpected failures and extend component life. The goal isn’t zero failures; it’s eliminating premature failures caused by preventable factors like contamination, overheating, or operating outside design parameters. Planned replacements during scheduled maintenance are always cheaper than emergency breakdowns.